Examples

Set up Raspberry Pi
Install system
I used rufus to write the official Raspberry Pi OS to SD card.
If you bought the SD card with Raspberry Pi, they may have installed one system.
It’s better to format it first and install the official one.
Initialize SSH
You need to create an empty file named ssh under the boot dir.
Then, you can connect your Raspberry Pi using some softwares, like MobaXterm and putty.
Connect to your Pi
Because I’m using the school Internet, the simple method (Edit wpa_supplicant.conf) mentioned in many guides don’t work.
I figured out that a laptop (connected to the school WIFI) and an Ethernet cable are enough.
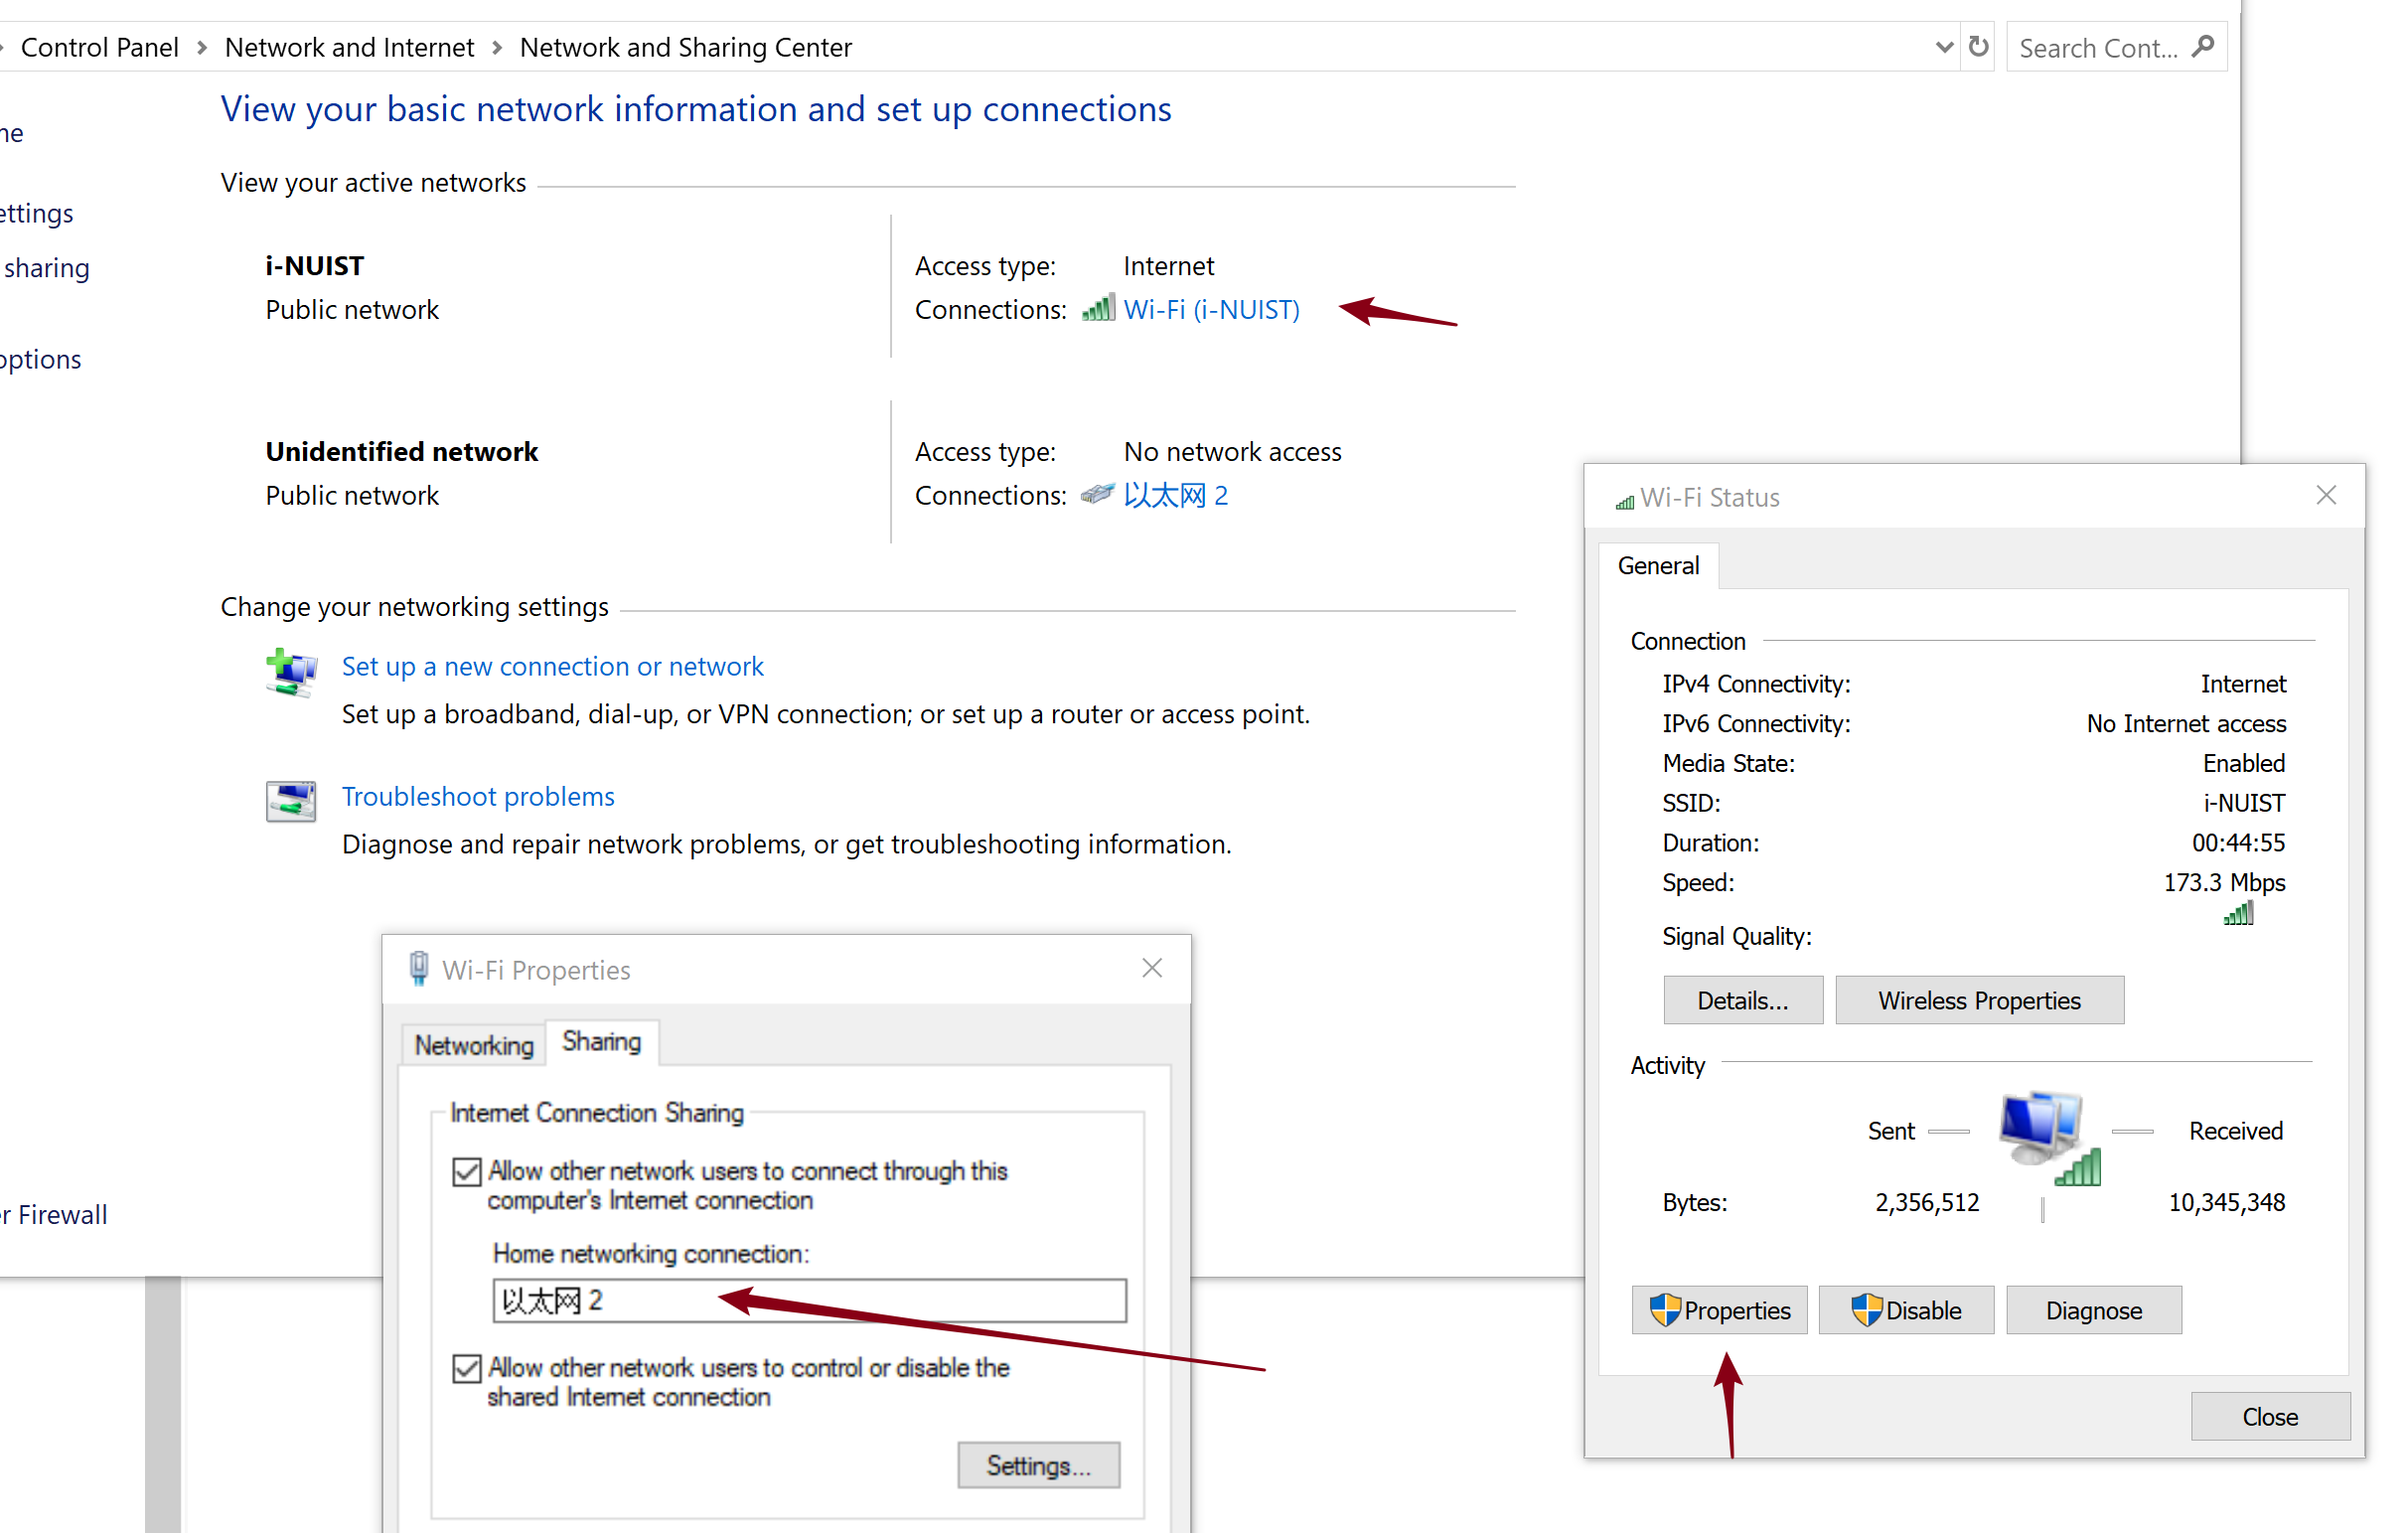
Connect the Pi to the laptop using cable
Share the network to the Ethernet
Check the IP by comparing the results of
arp -a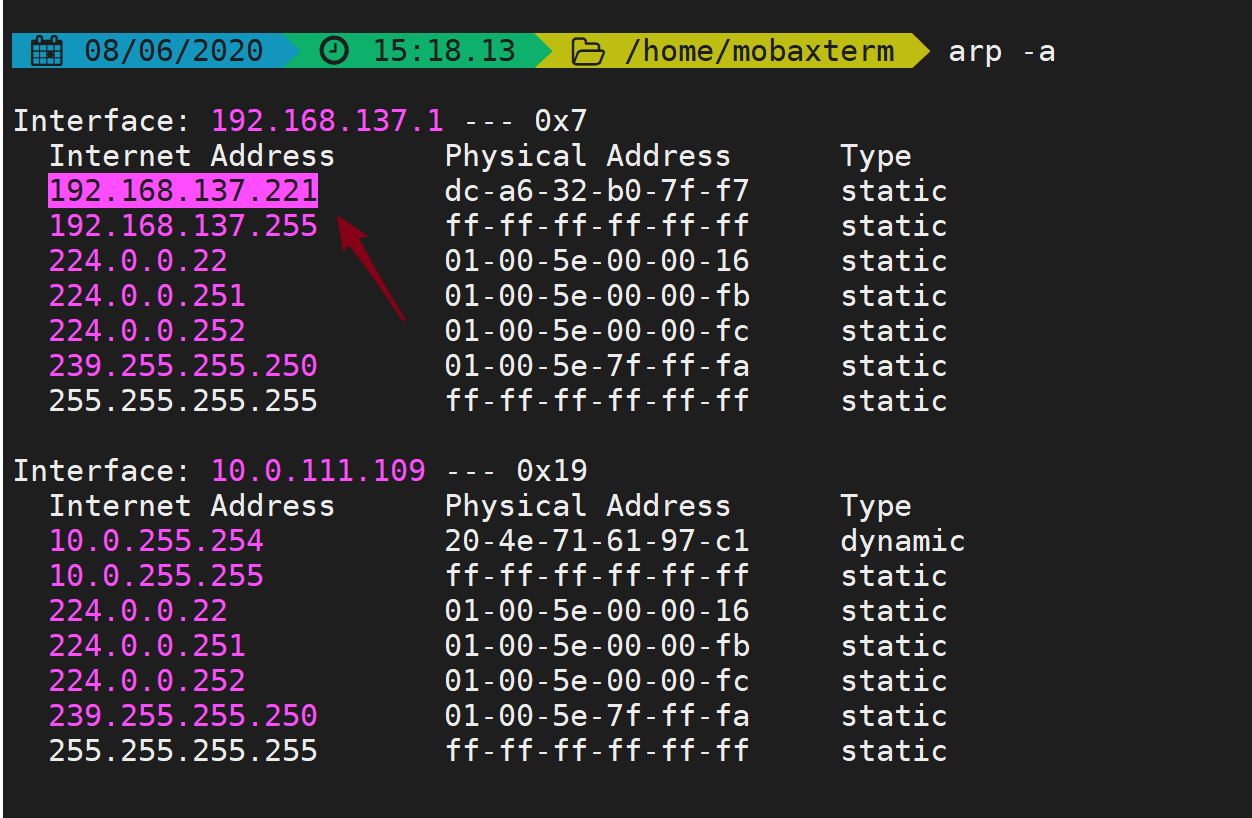
Install Python
Since I wanna do lots of things on the Pi, I prefer installing my own Python through Miniconda.
Please check this tutorial.
Set up camera
Enable camera
sudo raspi-config- Set a new password
- Set a hostname (mine is
maxdoas) Interfacing Options–>Camera–>Yes
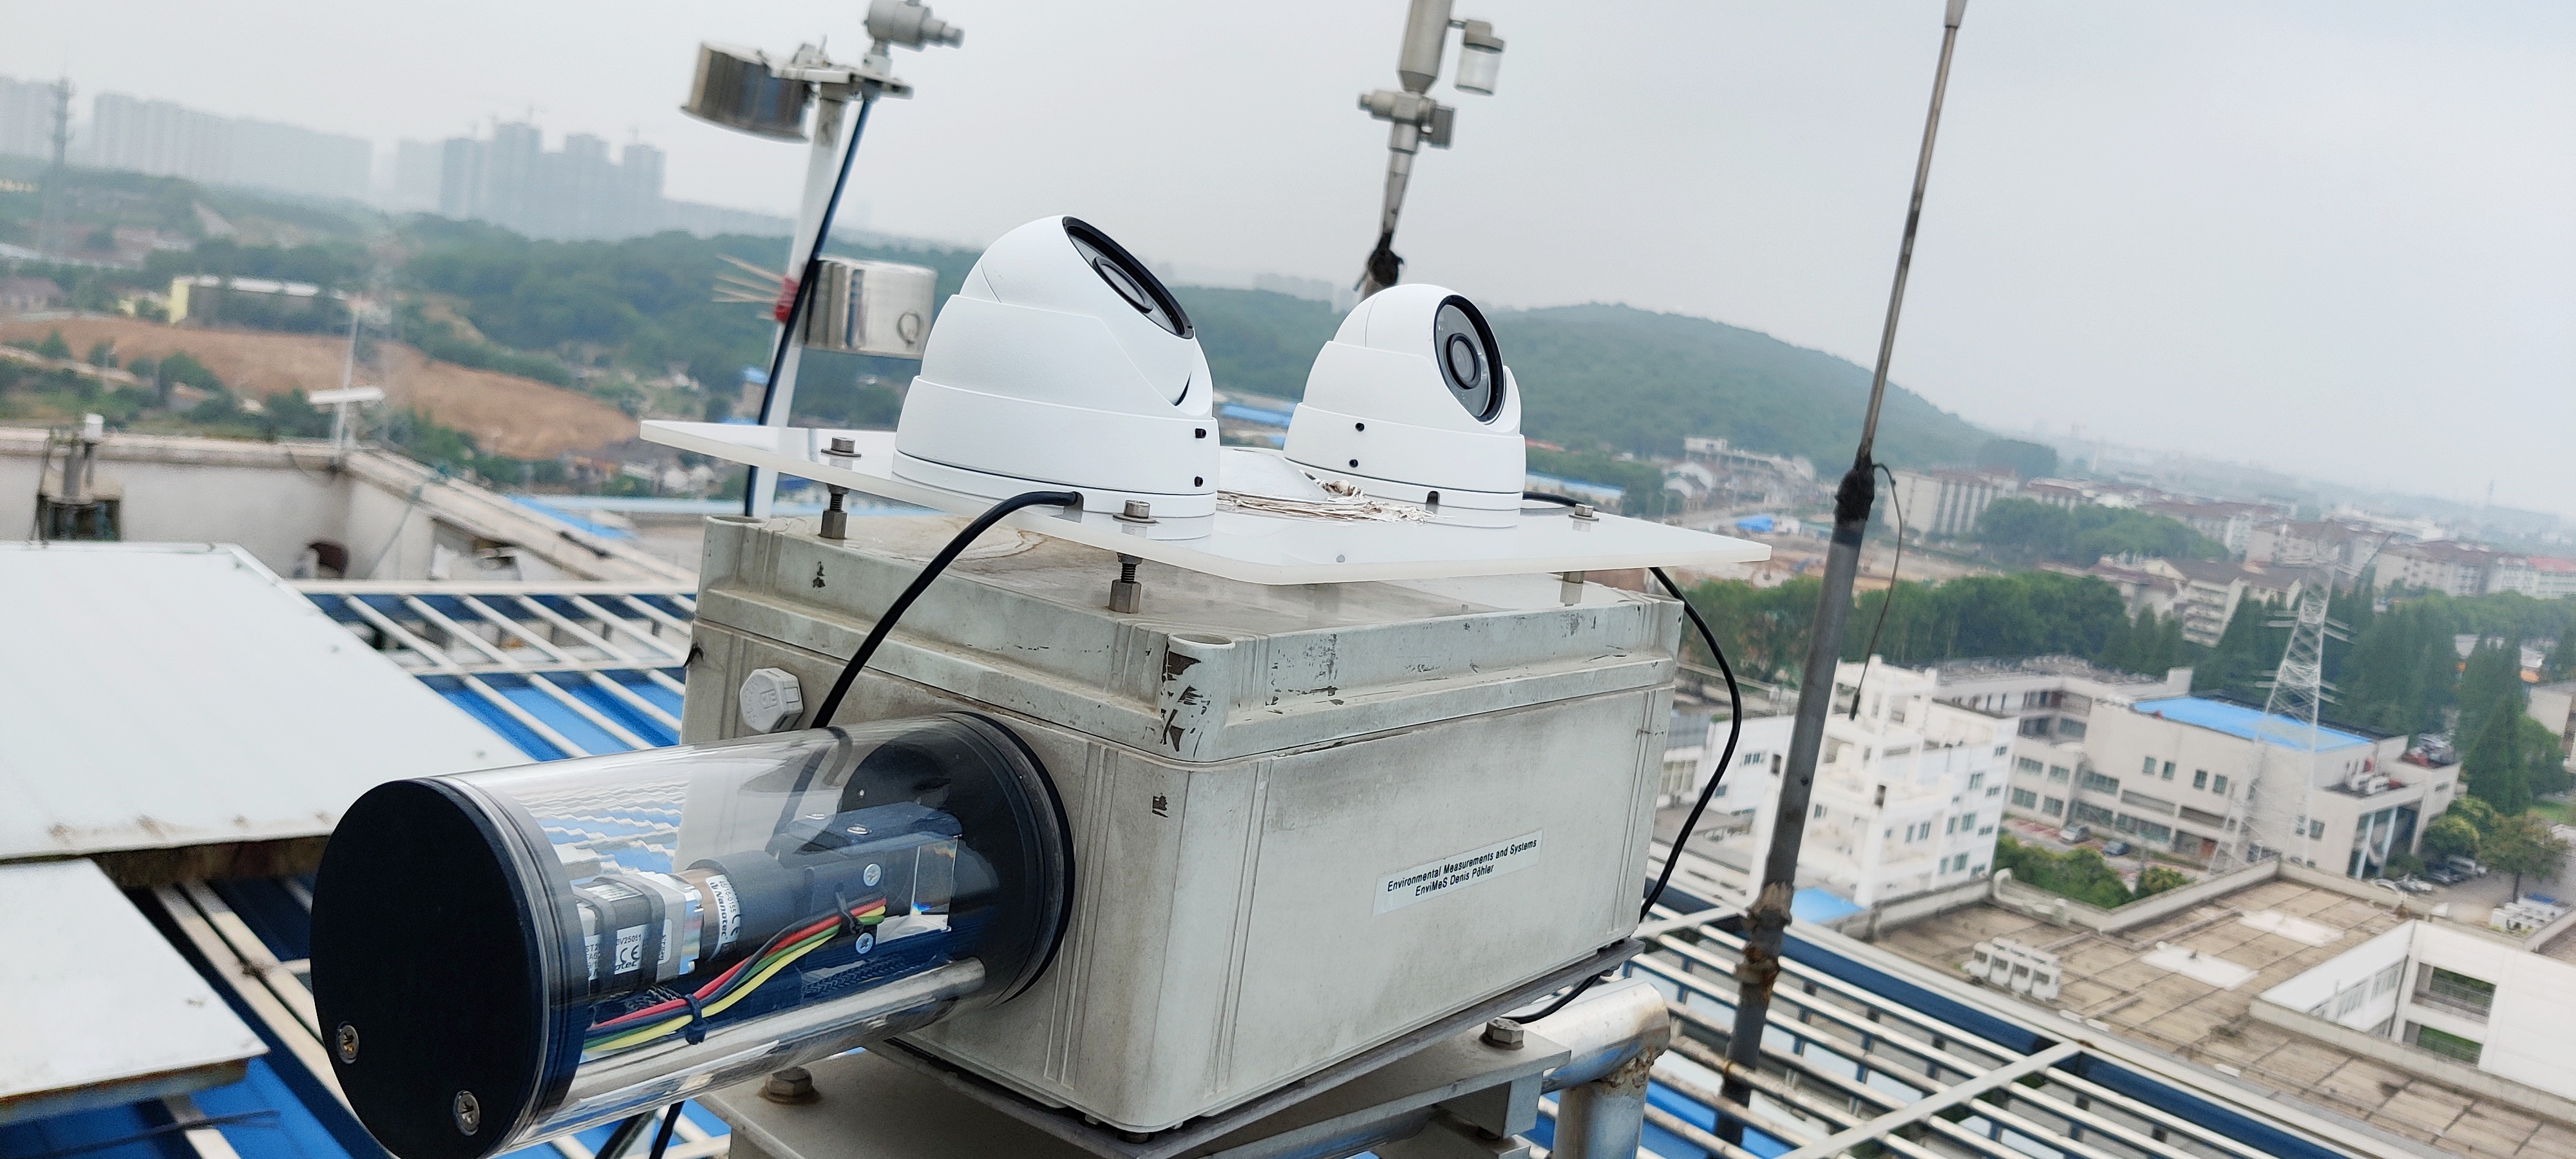
Install camera on the instrument
I fixed two USB cameras with screws on a board which is on the top of my instrument called MAX-DOAS.
Time-lapse script
We can get the ports of cameras by checking the results of
ls /dev/video*with cameras plugged in and not.pi@raspberrypi:~ $ ls /dev/video* /dev/video0 /dev/video10 /dev/video12 /dev/video3 /dev/video1 /dev/video11 /dev/video2I will use
/dev/video0and/dev/video2.Because I don’t wanna install too much libraries on Pi, I chose fswebcam (
sudo apt-get install fswebcam) to let the cameras capture images every 2 minutes:The content of
tlapse.py:import os import time import subprocess from datetime import datetime while True: # set ouput dir and filename lapse_dir = datetime.strftime(datetime.now(),"/home/pi/timelapse/%Y/%m/%Y%m%d/") os.makedirs(lapse_dir, exist_ok=True) prefix = datetime.strftime(datetime.now(),"%Y-%m-%d_%H-%M") filename = lapse_dir+"/"+prefix # take photos and save subprocess.call(['fswebcam', '-d', '/dev/video0', '-r','1920x1080', '-S', '20', '--rotate', '180', '--no-banner', filename+'_1.jpg']) #print('Saving photo to %s'%(filename)) time.sleep(0.5) subprocess.call(['fswebcam', '-d', '/dev/video2', '-r','1920x1080', '-S', '20', '--rotate', '180', '--no-banner', filename+'_2.jpg']) #print('Saving photo to %s'%(filename)) time.sleep(120)-r: resolution-S: skipping frames for auto focus--rotate: rotation--no-banner: without bannerLet us set it to take photos automatically when the Pi is started, especially for the power failure case.
Just add the Python path to the beginning of Python script
tlapse.pyand the script name to/etc/rc.local:tlapse.py
You can check the path of Python by
which python#!/home/pi/miniconda3/bin/python import os ......../etc/rc.local
/home/pi/tlapse.py &Reboot and check the process by
pgrep tlapse*.If you wanna kill it, you can type
sudo pkill tlapse*.
Sync images to server
As the SD card just has 64 G, I decide to sync the local images to the server by rsync.
This tutorial shows the detailed steps.
References
- Raspberry Pi Zero W as a headless time-lapse camera
- Working with a Webcam and Pi Camera
- Raspberry Pi Time-lapse Videos with USB Webcam
- Using rsync to synchronize a local and remote directory
Version control
| Version | Action | Time |
|---|---|---|
| 1.0 | Init | 2020-06-11 |
| 1.1 | Add skipping frames in script | 2020-06-12 |
Say something
Thank you
Your comment has been submitted and will be published once it has been approved.
OOPS!
Your comment has not been submitted. Please go back and try again. Thank You!
If this error persists, please open an issue by clicking here.